Removing Rust from Metal:
Which Abrasive for Light, Medium, or Heavy
Rust doesn't sit on steel. It eats into it, expands to several times the volume of the metal it consumed, and hides in pits where your abrasive can't reach. Get the severity wrong and you either waste an hour on a job a hand pad would've done — or prime over live rust and watch it bloom back through in six months.
"How do I remove rust" is the wrong question. The right one is "how much rust, and how deep."
A film of orange bloom on a machined surface and a scaling, pitted structural member are the same chemistry and completely different jobs. One is a two-minute conditioning pass. The other might not be an abrasive job at all.
This guide sorts rust into five severity levels you can actually diagnose in the field, tells you what to reach for at each one — and tells you where abrasives stop being the right tool.
Why Rust Doesn't Stop
Iron, oxygen, water. Take away any one and rust stops. Leave all three and it doesn't just continue — it accelerates. Three properties explain everything about how you have to attack it.
Iron oxide occupies substantially more volume than the iron it came from — by some accounts up to roughly six times for fully hydrated rust, depending on which oxide forms. That's why rust blisters lift paint, why it jacks bolted joints apart, and why a rusted assembly seizes solid.
The expansion has a consequence people miss at the bench: what you see is not what you lost. A blister that looks like a millimeter of rust represents a fraction of a millimeter of steel gone. The volume is theatre. Don't panic at the bloom — but don't relax about the pit underneath it either, because that's where the real loss is.
Aluminum's oxide is tight, adherent, and self-limiting: it forms and then shields the metal beneath. Rust is porous, flaky, and permeable. It holds moisture against the steel and keeps oxygen supplied. The oxide layer isn't a scab — it's a sponge.
This is the whole difference between a metal that patinas and a metal that rusts through. Aluminum stops itself. Steel doesn't. Leave the rust on and you've left the reaction fuelled.
Once corrosion establishes a pit, the chemistry inside that pit turns local, acidic, and self-sustaining. The pit becomes a small reactor that keeps working whether or not you cleaned the flat surface around it.
That third property is why this article exists, and it's the point everything else hangs on.
Five Levels of Rust, In Cross-Section
Same steel, same chemistry, five different jobs. The dashed line is where the surface used to be.
Rust shown filling the volume it occupies — including inside the pits. Note where the metal surface sits relative to the dashed line: the flat areas lose almost nothing, while the pits carry nearly all the section loss. That asymmetry is why removal fails where it fails.
Diagnosing it in the field
Flash Rust
Light orange bloom appearing on freshly cleaned or machined steel, often within hours. It's a film — no scale, no texture, no pitting. Frequently you caused it yourself by cleaning a part and leaving it overnight in a humid shop.
Test: wipe with a rag — it marks the rag. Fingernail finds no texture. Metal is bright underneath.
Light Surface
An even orange-brown layer across the surface. It's had time to establish but hasn't gone anywhere. No flaking, no lifting, no visible pits. Dimension is intact — this is a cosmetic and coating problem, not a structural one.
Test: scratch with a screwdriver — bright sound metal immediately beneath, no craters left behind.
Medium / Scaling
Rust is now laminar — it flakes, lifts, and comes away in sheets. Underneath the scale you'll find the first real pits. This is the level where the job changes character: you're no longer cleaning a surface, you're excavating one.
Test: scale lifts with a scraper. Under it, the surface is cratered rather than smooth. Fingernail catches.
Heavy / Pitted
Deep pitting with measurable section loss. Heavy scale, often layered. The pits are deeper than they look and they run in directions you can't see from the surface. At this level you need to know whether the remaining metal is still adequate before you spend any time cleaning it.
Test: measure remaining thickness. If the part is load-bearing, that measurement is the decision — not the appearance.
Perforated
Rust has gone through. There's no surface left to restore, because there's no metal left to restore it to.
This is not an abrasive problem. It's a cut-out-and-replace problem, and no disc, chemical, or converter changes that. Anyone selling you a solution at this level is selling you a delay.
Test: light passes through, or a screwdriver does. Stop cleaning. Start cutting.
Rust Removal Fails at the Pits, Not the Surface
The flat areas are trivial. Any abrasive on this site will clean a flat rusted surface to bright metal, and it'll look fantastic. That's not where jobs fail.
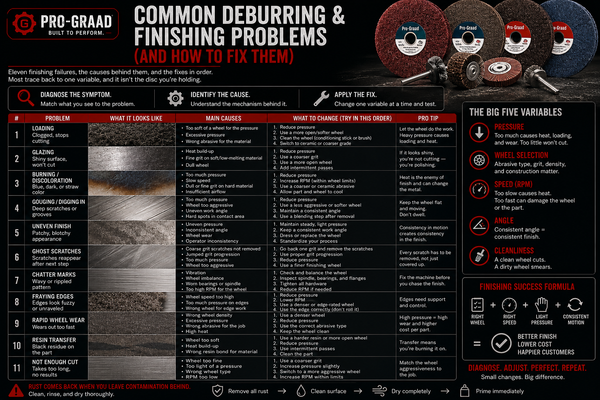
Jobs fail because a disc is a rigid or semi-rigid object bearing on a surface, and a pit is a hole below that surface. The abrasive rides across the top. It cleans the land between the pits beautifully, it burnishes the rims, and it leaves the rust sitting at the bottom of every crater — now hidden under a bright, clean-looking finish.
Then You Prime It
The coating goes over the top. It bridges the pits rather than filling them. Inside each one: rust, moisture, and the acidic self-sustaining chemistry from Section 01. The reaction never stopped — you just put a lid on it.
Six months later it blooms back through the paint and everybody blames the primer.
This is the same failure that runs through every finishing operation: the part that looks finished and isn't. A smeared burr looks deburred. Polished heat tint looks clean. And a bright surface with live rust in the pits looks like a finished repair.
The Rule That Follows
Once there are pits, the method has to reach into them — or you have to remove enough metal to eliminate them entirely. Those are the only two honest options. Everything else is decorating.
That single rule decides your method, and it's why Section 05 tells you to put the disc down on heavy pitted work.
What to Reach For, by Severity
Find your level. Start with the gentlest thing that works — you can always escalate, but you can't put metal back.
| Level | Reach For | Then | Why |
|---|---|---|---|
| Flash | Non-woven hand pad or disc — Medium | Clean, coat same day | It's a film. Non-woven lifts it without touching base metal or changing dimension. Reaching for a flap disc here is removing good steel to fix a stain. |
| Light | Non-woven — Coarse → Medium | Step to Very Fine if finish matters | Still no dimensional loss required. Non-woven conforms to contour and won't gouge — ideal on panels, tube, and anything cosmetic. |
| Medium | Flap disc — 60–80 grit, zirconia | Non-woven Medium to blend | Scale needs real cutting. A flap disc takes the scale and the shallow pits in one pass and leaves a surface you can coat. This is the level where abrasives are exactly the right answer. |
| Heavy | Fiber disc — 36–50 grit, zirconia | Reassess — see Section 05 | Fast bulk removal of scale. But a disc alone will not clean deep pits. Get the bulk off, then look honestly at what's left in the craters. |
| Perforated | Cutting tools | Weld in new material | There's nothing to save. Clean the sound metal around the repair, cut out the rest. |
↔ Scroll table horizontally on mobile
Mineral: Zirconia for Rust, Aluminum Oxide for Finish
Zirconia self-sharpens under pressure, which is what you want cutting scale — and scale is abrasive enough to dull a lesser grain fast. Aluminum oxide is the general-purpose choice for the finishing passes afterward. Silicon carbide has its place on non-ferrous, but you're not removing rust from non-ferrous, because non-ferrous doesn't rust.
Don't Start Coarse "To Save Time"
The instinct on rust is to grab the most aggressive thing in the drawer. But on flash and light rust you're removing good steel to fix a film — and then chasing 36-grit scratches out of a panel for the next twenty minutes. Diagnose first. The gentlest effective method is almost always the fastest to done.
When Abrasives Are the Wrong Tool
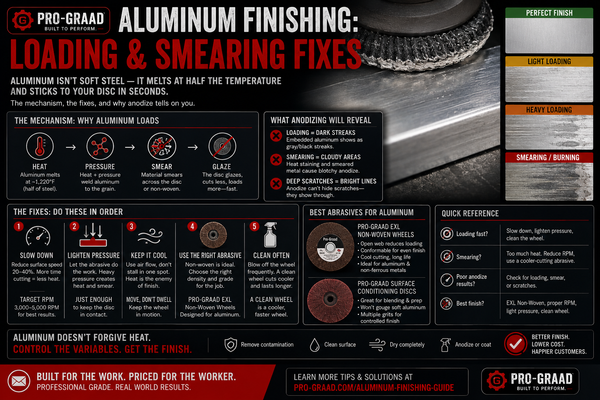
We sell abrasives. On heavy pitted rust, we'd tell you to use something else — because of the pit rule in Section 03, and no disc repeals it.
| Method | Reaches Pits? | Where It Wins / Loses |
|---|---|---|
| Abrasive disc | No — rides over them | Wins: flat and contoured surfaces, flash through medium, anywhere finish matters. Fast, controllable, no chemicals. Loses: deep pits. Cleans the land, leaves the craters. |
| Abrasive blasting | Yes | Wins: heavy pitted work, complex geometry, large areas. Media impacts the pit floor at angle — it goes where a disc can't. Loses: containment, media disposal, silica and dust controls, and it profiles everything it touches whether you wanted that or not. |
| Chemical / acid | Yes | Wins: dissolves rust wherever liquid reaches, including inside pits. Good on small parts and complex shapes. Loses: handling, neutralization, rinse water, disposal. Flash rusts immediately after unless coated fast. |
| Electrolysis | Yes | Wins: genuinely excellent on pitted, intricate, or delicate parts — it works at the metal surface wherever the electrolyte reaches and doesn't remove sound steel. Cheap to set up. Loses: tank-size parts only, slow, needs line of sight to the anode for even results. |
| Wire wheel | No — and it burnishes | Wins: loose scale knockdown, fast and cheap. Loses: it can smear metal over pits rather than opening them, hiding rust more effectively than a disc does. Popular, and routinely the worst choice on pitted work. |
| Rust converter | Converts, doesn't remove | Wins: inaccessible areas, agricultural and structural work where full removal isn't practical, as a considered engineering decision. Loses: it's not removal. On visible, structural, or warrantied work, treat it as a compromise you're choosing knowingly — not a shortcut. |
↔ Scroll table horizontally on mobile
The Honest Recommendation
Flash through medium: abrasives, every time. Fast, controllable, no chemistry, no containment, and you finish the surface in the same operation.
Heavy and pitted: blast it, or dissolve it. Then come back with an abrasive to finish. Using a disc to chase rust out of deep pits is an hour of work that produces a part that looks clean and isn't.
After Removal, You're On a Clock
Bare steel is the most reactive it will ever be the second you finish cleaning it. You've removed the oxide and exposed fresh iron to a room full of oxygen and water vapor. In a humid shop, flash rust can appear within hours.
- Clean and coat in the same shift. Not Friday-clean, Monday-prime. That gap is where flash rust lives, and you'll be doing the job twice.
- Don't touch it. Skin oils and salts are an excellent rust starter. Gloves after the final pass.
- Watch the dew point. Cold steel brought into a warm shop condenses moisture out of the air onto itself. You can't see it, and the primer will.
- Match the profile to the coating. Coatings need anchor tooth to grip — too smooth is a real adhesion failure. The coating manufacturer's data sheet governs, and it overrides any general advice, including ours.
The Job Isn't Rust Removal
The job is a coated part that doesn't rust again. Removal is one step in that, and it's worth nothing on its own — cleaned steel left uncoated is just steel at the start of a fresh cycle. Plan the coating before you start cleaning, not after.
Two Things That Aren't Rust
Stainless steel "rust"
If stainless is showing orange spots, the alloy almost certainly isn't rusting — something on it is. The usual culprit is free iron contamination: particles picked up from a carbon steel abrasive, wire brush, work table, or fixture, sitting on the surface and rusting on their own. The stainless underneath is fine.
The fix isn't a rust removal method — it's decontamination, and then not doing it again. Dedicate your stainless abrasives and keep them physically separate from carbon steel work. The other candidate is a chromium-depleted heat tint zone that got polished over instead of removed.
Aluminum corrosion
Aluminum doesn't rust — there's no iron in it. It oxidizes, and its oxide is tight and self-limiting, which is why aluminum weathers to a dull gray and stops rather than eating through. White powdery bloom is aluminum oxide or a salt, and it's a cosmetic and adhesion issue, not a structural countdown.
Treat it as surface conditioning: silicon carbide non-woven, light pressure. Don't attack it like rust — you'll remove good metal chasing a problem that isn't progressing.
Why This Matters for Your Method
Rust is a reaction in progress that will continue until you stop it. Aluminum oxide has already stopped. Free iron on stainless is a passenger, not a process. Only one of the three is a clock. Diagnosing which you're looking at decides whether you're doing urgent work or cosmetic work.
Six Ways Rust Removal Goes Wrong
- Priming over pitted rust. The headline failure. It looks perfect, and it blooms back through in months. If there are pits, the method has to reach them.
- Starting at 36 grit on a light film. Removing good steel to fix a stain, then chasing coarse scratches for twenty minutes. Diagnose before you grab.
- Wire wheeling pitted steel. It smears metal over the pit mouths and hides rust better than doing nothing. Fast, satisfying, counterproductive.
- Cleaning today, coating next week. Bare steel flash rusts in hours. You'll do the job twice and the second time will be worse.
- Treating a converter as removal. It's a considered compromise for inaccessible work, not a shortcut for work you could reach.
- Cleaning a part that should be replaced. Measure remaining section on structural work before you invest an afternoon in it. Appearance is not a thickness gauge.
Before You Start: Two Safety Checks
Old paint. Coatings on pre-1978 structures and equipment may contain lead. Abrading or blasting them aerosolizes it. Test before you disturb it and follow the applicable regulations — this is not a "crack a window" situation.
Structure. Heavily rusted load-bearing members may be holding load right now, and removing scale can reveal that they shouldn't be. If it's structural, that's an engineering call before it's a cleaning job. Dust extraction, eye and face protection, and respiratory protection appropriate to the material apply throughout.
Answers, Short Version
What's the best abrasive for removing rust?
Depends entirely on severity. Flash and light rust: non-woven, Coarse to Medium — it lifts the film without touching base metal. Medium scaling rust: a 60–80 grit zirconia flap disc. Heavy scale: 36–50 grit fiber disc for bulk removal. Deep pitted rust: not an abrasive job — blast it or dissolve it, then finish with an abrasive.
Why does rust come back after I sanded and painted it?
Because you left it in the pits. A disc rides across the surface and cleans the flat land between pits beautifully while leaving rust at the bottom of each crater. Primer bridges over the top, and the acidic self-sustaining chemistry inside the pit carries right on. It blooms back through in months and everyone blames the paint.
Can I use a wire wheel to remove rust?
For knocking loose scale off, yes. On pitted steel it's often the worst choice available — it smears metal across the pit mouths, hiding the rust more effectively than a disc would. It feels productive and it's counterproductive.
Do rust converters actually work?
They convert rust to a more stable compound rather than removing it. That's genuinely useful where full removal isn't practical — inaccessible areas, agricultural equipment, some structural work — as a decision you make knowingly. It isn't removal, and on visible, structural, or warrantied work it's a compromise, not a shortcut.
How deep do rust pits actually go?
Deeper than they look, and often in directions you can't see. Rust expands to several times the volume of the steel it consumed, so the visible bloom overstates the loss on flat areas — but a pit undercuts and spreads beneath the surface. On structural work, measure remaining thickness rather than judging by eye.
My stainless steel is rusting — why?
It probably isn't. Orange spots on stainless are usually free iron contamination — particles from a carbon steel abrasive, brush, table, or tool sitting on the surface and rusting themselves. The alloy is fine. The fix is decontamination and dedicated stainless abrasives, not a rust removal method.
How soon do I need to paint after removing rust?
Same shift. Bare steel is the most reactive it will ever be right after cleaning, and flash rust can appear within hours in a humid shop. Don't clean on Friday and prime on Monday — plan the coating before you start cleaning.
When is a rusted part beyond saving?
When rust has gone through the section, there's nothing to restore. Before that, on anything load-bearing, the answer is whatever your remaining thickness measurement says against the requirement — not what the surface looks like after cleaning. If it's structural, that's an engineering decision.
Built for the Work.
Priced for the Worker.
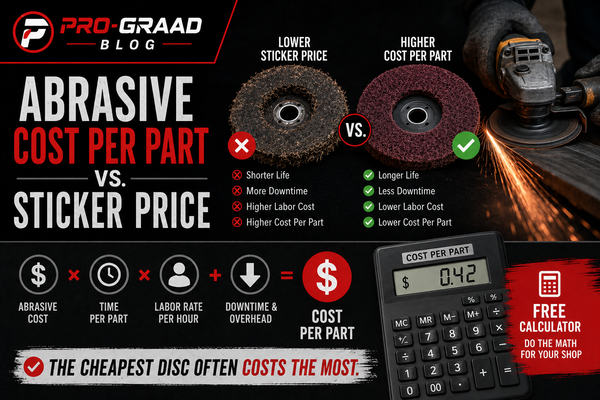
Pro-Graad is an independent brand making non-woven discs, flap discs, and fiber discs for shops that measure performance in parts finished, not in logos on the box. Full grit and grade ranges, honest specs, no premium tax. Available direct at pro-graad.com.
Shop the Full Rangeinfo@pro-graad.com · pro-graad.com
This guide is general technical reference, not a substitute for your print, a coating technical data sheet, an engineering assessment of a structural member, or the regulations governing lead, silica, and dust exposure in your jurisdiction. Where a specification or regulation applies, it governs.