Common Deburring & Finishing Problems
(And How to Fix Them)
Ten failures, what's physically causing each one, and what to change — ranked by what to try first. Most of them trace back to the same variable, and it isn't the disc.
What's It Doing?
Find your symptom. Each one gets the mechanism, the causes ranked by likelihood, and the fixes in the order worth trying.
Most of These Are Pressure
Before the individual fixes, the thing they have in common. Every abrasive has a pressure window — a band where the grain actually cuts. Outside that band, in either direction, it stops cutting and starts doing something else to your part.
Qualitative — the shape is the point, not the numbers. The window moves with the mineral. Silicon carbide cuts at light pressure and breaks down if you lean on it. Zirconia needs real pressure to self-fracture and just polishes if you go gentle. The same hand pressure is "too light" for one and "too heavy" for another.
The Sentence That Fixes Most of This
An abrasive that isn't cutting is rubbing, and rubbing is what damages parts. There's no neutral setting. Every second a glazed, loaded, or wrongly-pressured abrasive spends on the work, it's putting heat in, hardening the surface, or folding metal over — not removing it.
Which means: when something's going wrong, pressure and abrasive condition are the first two things to check, before you change products.
Symptom, Cause, Fix
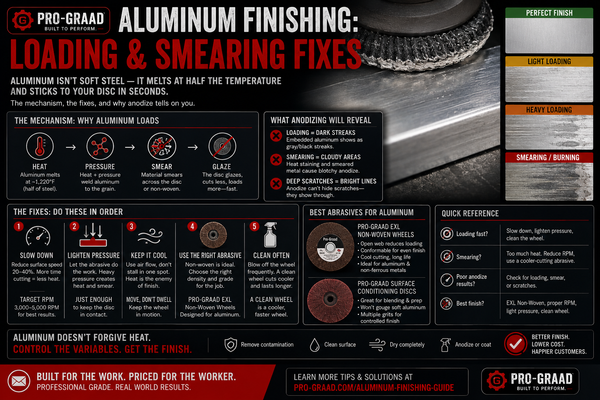
Loading / Clogging
The abrasive packs with material. Cut rate drops off a cliff. You can see swarf welded into the face, often as shiny smears.
What's happening
Swarf isn't clearing. It's filling the space between grains, so the grain can't reach the work — you're now rubbing the part with compacted metal. Soft, ductile, or low-melting materials do this fastest, and heat makes it worse because warm metal is stickier.
Causes — most likely first
- Wrong material for a closed-coat abrasive. Aluminum, brass, copper, lead, plastics, and paint load almost instantly on closed coat.
- Too much pressure. Packs swarf in and generates the heat that makes it stick.
- Too fine a grit for the removal rate you're asking for — small spaces fill faster.
- Speed too high. Heat again.
- Contaminated surface — grinding a greasy or painted part packs the abrasive with a paste of both.
Fixes — try in this order
- Ease off the pressure. Free, instant, and it's the cause about half the time.
- Switch to open coat or a stearated product. The stearate is a dry lubricant that resists loading — it exists for exactly this.
- Drop the tool speed. Less heat, less sticking.
- Go coarser if the finish allows. More chip clearance.
- Clean the part first. Degrease before abrading, never after.
- Silicon carbide on non-ferrous. Sharper, cuts cooler at light pressure.
Don't Keep Running It
A loaded abrasive isn't cutting — it's burnishing at speed. You're not saving the disc by finishing the part with it. You're heating the work and adding a step.
Glazing / It Stopped Cutting
The face looks polished and shiny. Sparks have died off. There's still plenty of abrasive left, and it's doing nothing.
What's happening
The grain has dulled without fracturing. Sharp abrasive works because grain edges are sharp; the good minerals stay sharp by breaking — fresh edges expose as old ones wear. When grain rounds over instead of fracturing, you're left with smooth bumps polishing the work.
Causes — most likely first
- Too little pressure on a self-sharpening mineral. Zirconia and ceramic need load to micro-fracture. Run them gentle and they glaze — the opposite of the instinct.
- Wrong mineral for the material. Aluminum oxide on hardened or stainless steel dulls rather than refreshing.
- Too much pressure + heat on aluminum oxide — cooks the bond and rounds the grain.
- It's loaded, and you're reading loading as glazing. Look closely.
- Speed too high for the mineral and material.
Fixes — try in this order
- Identify the mineral first. Everything below depends on it, and this is where most people go wrong.
- Zirconia or ceramic glazing? Push harder. Counterintuitive, correct. It needs load.
- Aluminum oxide glazing? Ease off and check for heat.
- Change the mineral. Ceramic for stainless, hardened, and superalloys. Zirconia for steel stock removal.
- Replace it. Once glazed, it's usually done — you're paying labor to run a product that's finished.
The Fix Is Opposite Depending on the Mineral
This is the single most useful thing in this article. Glazing has two opposite causes. Zirconia glazes because you're too gentle. Aluminum oxide glazes because you're too rough. Apply the wrong fix and you'll make it worse and conclude the disc is junk.
Burning & Discoloration
Blue, straw, or brown coloring on the work. On hardened steel, possible loss of temper. On thin panels, distortion.
What's happening
Energy is going into the part as heat instead of leaving in the chip. In a healthy cut, most of the heat leaves with the swarf. When the abrasive rubs instead of cutting, all that energy dumps straight into the workpiece. Stainless makes it worse — it conducts heat at roughly a third the rate of carbon steel, so heat concentrates at the contact point instead of spreading.
Causes — most likely first
- Dull, glazed, or loaded abrasive. Not cutting = all heat.
- Dwelling. Holding the tool in one spot, even briefly.
- Too much pressure.
- Speed too high for the material.
- Wrong mineral — ceramic cuts cool because it stays sharp; the others don't on tough alloys.
- Thin or low-mass part with nowhere for heat to go.
Fixes — try in this order
- Keep it moving. Constant travel, never stationary.
- Fresh abrasive. A "still has life in it" disc is a heat source.
- Less pressure, more travel speed.
- Ceramic on stainless and hardened steel. It self-fractures and cuts cool.
- Slow the tool down.
- Let it cool between passes. Or go wet if the product is rated for it.
Going Finer Is the Wrong Instinct
When a part burns, people often reach for a finer grit to "be gentler." Finer grit has less chip clearance and more rubbing contact — it generates more heat, not less. The fix is a sharper abrasive and more travel speed, not a finer one.
Gouging / Digging In
Craters, tracks, and low spots. The part has dimension missing where you didn't want it gone, and you're now blending a defect you created.
What's happening
Contact pressure concentrated on a small area instead of spread across the face. Either the tool is presented at too steep an angle, the backing is too rigid to spread the load, or an edge of the abrasive is catching the work.
Causes — most likely first
- Too steep an angle. The edge of the disc is doing everything.
- Too much pressure concentrated on a corner.
- Backing too firm for the contour — it can't follow, so it bridges and digs.
- Too aggressive a product. A fiber disc on a job that wanted non-woven.
- Wrong wheel density — a hard wheel on a contoured part won't conform.
- Inconsistent presentation. Rocking the tool.
Fixes — try in this order
- Flatten the angle. More face on the work, less edge.
- Lighter, more even pressure.
- Softer backing pad so it conforms rather than bridges.
- Step down the aggression. Non-woven won't gouge — that's its whole point.
- Type 27 instead of Type 29 for flatter work.
- Lower wheel density on contoured parts.
Uneven / Blotchy Finish
Patchy sheen. The repair is visible against the parent surface. It looks fine head-on and terrible at a low angle.
What's happening
Finish uniformity is about consistency, not fineness. Sheen is produced by a repeating scratch pattern of consistent depth and direction. Vary the pressure, the direction, or the abrasive condition across the surface and you get different patterns side by side — which the eye reads instantly as blotchy, even when the average roughness is identical everywhere.
Causes — most likely first
- Inconsistent grain direction. The biggest one. Cross-hatching where the parent surface runs straight.
- Varying pressure across the pass.
- Abrasive wearing during the job — the start and end of the pass aren't the same product any more.
- Overlapping passes unevenly. Double-worked bands.
- Mixing abrasive types mid-surface. Non-woven and coated leave visibly different finishes at nominally the same grade.
- Not matching the parent finish in the first place.
Fixes — try in this order
- Match the grain direction of the surrounding surface. Straight-line passes.
- Consistent pressure and travel speed. Uniformity beats fineness, always.
- Work the whole face, not just the defect. Blend outward past the repair.
- One abrasive per surface. Don't finish half a panel with a worn disc and half with a new one.
- Consistent overlap — about half the disc width, every pass.
- Test on scrap to match the parent finish before touching the part.
A Consistent 60 Beats a Blotchy 30
People chase a finer grade when a finish looks wrong. Usually the problem isn't fineness — it's consistency and direction. A uniform coarser finish reads as intentional. A patchy fine one reads as a repair. Fix the direction before you fix the number.
Ghost Scratches / They Won't Come Out
You've stepped up through the grits and there are still scratches. They show up under coating, under raking light, or after polish — never during the work.
What's happening
Every grit has exactly one job: remove the scratches the previous grit left. Skip too far and the finer grit physically can't reach the bottom of the coarser grit's trenches — it polishes the peaks, leaves the valleys, and the surface looks fine until light hits it at the wrong angle.
Causes — most likely first
- Skipped grits. 80 straight to 320 is the classic.
- Didn't fully remove the previous pattern before stepping up.
- Same direction every step, so you can't tell whose scratches you're looking at.
- A stray coarse contaminant — one loose grain from the previous step dragging through.
- CAMI/FEPA confusion. Thinking 400 followed P400 — it doesn't, that's roughly a two-step jump.
Fixes — try in this order
- Go back. Down to the grit that made them. You can't finish your way out.
- Never skip more than one step. 80 → 120 → 180 → 220 → 320.
- Cross-hatch each step 45–90° to the last one. When the previous direction's pattern is gone, that step is done — this is the only reliable test.
- Clean between grits. One stray coarse grain undoes a whole step.
- Check your scale. CAMI 400 ≈ P800.
- Inspect at a low angle under raking light, not head-on.
Chatter / Vibration
Regular repeating lines or facets on the surface. The tool buzzes or bounces. The finish has a rhythm to it.
What's happening
Something in the system is oscillating and the abrasive is recording it on your part. Regular, evenly-spaced marks are a signature — they mean a rotating or resonating source, not operator technique.
Causes — most likely first
- Wheel or disc out of round. Worn unevenly, or never trued.
- Not seated concentric on the arbor. Check the adapter.
- Part not rigidly held. The part is vibrating, not the tool.
- Worn tool bearings or spindle.
- Too much pressure on a flexible setup — it starts to bounce.
- Thin or unsupported workpiece resonating.
Fixes — try in this order
- Check the mount. Seated, concentric, correct adapter, nut tight.
- Inspect the wheel for runout. Replace or true it.
- Clamp the part harder, and support thin sections from behind.
- Ease the pressure. Bouncing is a pressure symptom on flexible setups.
- Check the tool — spin it without abrasive and listen.
- Change the contact angle to break the resonance.
Edge Rounding / Undercutting
Edges that should be crisp are rounded. Weld toes are undercut. A machined profile has gone soft. You've removed more than the print allows at the edge.
What's happening
Abrasives cut faster where pressure is higher, and pressure is always higher at an edge — there's less material carrying the load. A conforming abrasive wraps around the edge and works it from two directions at once. The edge disappears faster than the flat, and it happens quicker than you expect.
Causes — most likely first
- Dwelling on or near the edge.
- Too soft a backing or wheel — it wraps the edge.
- Working off the edge instead of along or onto it.
- Too aggressive a product for edge work.
- No defined stopping point. Nobody decided what "broken" means.
Fixes — try in this order
- Travel along the edge, not off it.
- Firmer backing or higher wheel density so it holds shape instead of wrapping.
- Non-woven for edge break where tolerance is tight — it won't overshoot.
- Define the edge condition before you start. Chamfer? Radius? How big? Write it down.
- Fewer, more deliberate passes. Edges go fast.
The Burr Won't Come Off
You've worked the edge and it looks clean — but a fingernail still catches. The burr appears to be gone and isn't.
What's happening
You're folding it, not cutting it. A ductile burr — stainless is the worst offender — bends before it breaks. If the abrasive can't get under the burr, it pushes it flat against the surface instead, where it work-hardens into place and stays. It looks deburred. It lifts in service, cleaning, or assembly.
Causes — most likely first
- Dull or glazed abrasive. Can't get under it, so it pushes it over.
- Too much pressure. Presses the burr flat.
- Wrong mineral for a work-hardening alloy.
- Approaching from one direction only. You fold it the way you're traveling.
- Ductile material — stainless, some aluminums, copper. It's the material fighting you.
Fixes — try in this order
- Fresh, sharp abrasive. Non-negotiable on ductile material.
- Lighter pressure. Let it cut, don't press.
- A conforming product — a convolute wheel or non-woven gets under the burr and cuts it rather than riding over it.
- Work from both directions.
- Fingernail test, both ways, before the part moves. Every time.
Test It Before It Ships, Not After
Drag a fingernail across the edge perpendicular, from both sides. Catch from either direction means the burr is still attached. It's the cheapest quality gate in the shop and it's skipped constantly, because the edge looks fine.
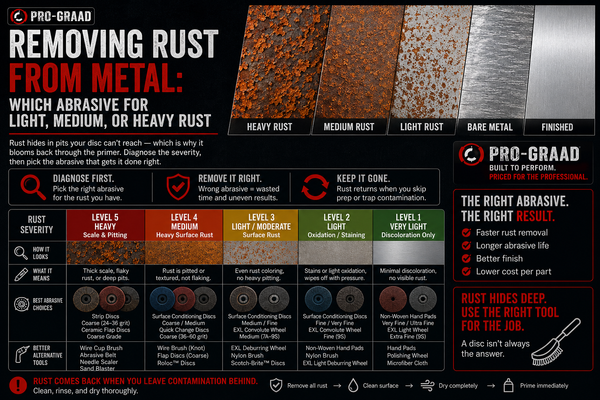
Rust or Staining After Finishing
Stainless parts that left the shop perfect come back with orange spots. Sometimes weeks later. Sometimes at the customer.
What's happening
Almost certainly not the alloy. Free iron particles — picked up from an abrasive, brush, table, or tool that touched carbon steel — are embedded in the stainless surface, and they are rusting. The stainless underneath is fine. The other candidate is a chromium-depleted heat tint zone that got polished over instead of removed.
Causes — most likely first
- Shared abrasives. Non-woven is especially bad — the open web traps iron and carries it.
- Shared benches, fixtures, clamps, tables.
- Carbon steel wire brush. Guaranteed contamination.
- Heat tint polished over rather than removed — color gone, depleted layer still there.
- Chlorinated solvents leaving residue.
- Bare-hand handling after final finish.
Fixes — try in this order
- Dedicate abrasives to stainless. Label them. Store them separately. This is a discipline, not a product.
- Separate the work area where you can, clean it where you can't.
- Stainless brushes only, and only ever on stainless.
- Remove tint properly — the metal under the color, not just the color.
- Check the solvent is rated for stainless.
- Passivate if the spec calls for it. Follow the governing standard, not a rule of thumb.
No Product Fixes This
This is the one failure on the list you cannot buy your way out of. There is no abrasive on the market that prevents cross-contamination — it's housekeeping, and the delay between cause and consequence is what makes it so expensive.
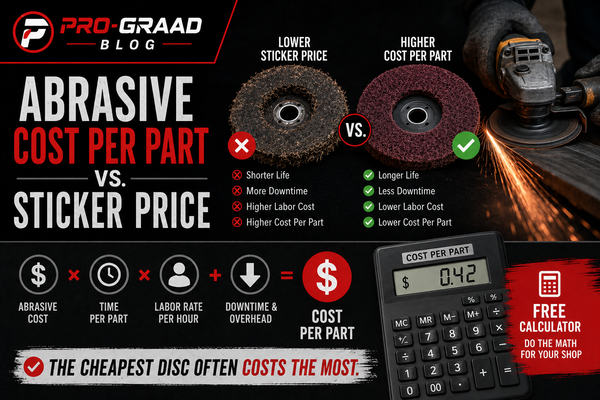
Short Disc Life
You're burning through product. Cost per part is climbing and it feels like the discs are junk.
What's happening
Maybe they are. More often the disc is being asked to do something it isn't built for, or being killed by pressure. Before you switch products, rule out the free causes — every one of them costs nothing to test.
Causes — most likely first
- Too much pressure. Crushes grain and generates heat that cooks the bond. The single biggest killer.
- Wrong mineral for the material. The grain is dying instead of cutting.
- Wrong product for the job. Fiber disc has one layer of mineral — no reserve. That's not a defect, it's the design.
- Loading, so it stopped cutting long before it wore out.
- Speed wrong for the mineral.
- Different operators, different definitions of "dead." Half the variance in most shops.
Fixes — try in this order
- Watch the pressure for one shift. Free, and it's usually the answer.
- Match mineral to material. Ceramic for stainless and hardened. Zirconia for steel removal. SiC for non-ferrous.
- Check you're using the right product type for the operation at all.
- Define "dead" and hold everyone to it.
- Then compare products — with a controlled test, not a hunch.
The Diagnostic Sequence
Something's wrong and you can't name it. Work these in order — they're sorted by how cheap they are to check, not how likely they sound.
-
Look at the abrasive, not the part
Loaded? Glazed? Worn through? The face tells you more than the workpiece does, and it takes three seconds. Most problems announce themselves here.
-
Change nothing but the pressure
Costs nothing, and it's the root cause more often than any other single variable. Try lighter. If the mineral is zirconia or ceramic, try heavier. Note which direction helps — that alone tells you what's happening.
-
Confirm the mineral matches the material
Ceramic for stainless and hardened steel. Zirconia for steel stock removal. Aluminum oxide general purpose. Silicon carbide for non-ferrous. Wrong mineral looks like a dozen different problems.
-
Fit a fresh one
Cheaper than an hour of diagnosis. If a new disc fixes it, the old one was the problem and you've learned something about when to change them.
-
Check the mount and the tool
Seated, concentric, right adapter, correct speed, guard on. Then spin the tool without abrasive and listen.
-
Question the product type
Not the brand — the type. Are you asking a non-woven disc to remove stock? A fiber disc to leave a finish? Half of "this product is bad" is a product being asked to do someone else's job.
-
Only now, change products
And when you do, test it properly — same operation, same operator, count parts, three discs minimum. Otherwise you've swapped one hunch for another.
Steps 1–3 Are Free
They cost nothing but attention, and between them they resolve the large majority of finishing complaints. Most shops jump straight to step 7 — change the product — because it's the one that feels like doing something. It's also the most expensive, and it doesn't fix a pressure problem.
Answers, Short Version
Why does my flap disc keep clogging?
Usually the material and the coat. Aluminum, brass, copper, plastics, and paint load closed-coat abrasives almost instantly. Switch to open coat or a stearated product, ease off the pressure, and drop the tool speed — heat makes swarf stickier. Degrease the part before abrading, never after.
Why did my disc stop cutting when it still looks new?
Glazing — the grain dulled without fracturing. The fix depends entirely on the mineral, and it's opposite in each direction. Zirconia and ceramic need pressure to self-sharpen, so glazing means you're too gentle. Aluminum oxide glazes from heat, so it means you're too rough. Identify the mineral before you change anything.
Why does my stainless keep burning?
Stainless conducts heat at roughly a third the rate of carbon steel, so heat concentrates instead of spreading. Any abrasive that's rubbing rather than cutting dumps all its energy into the part. Use ceramic, keep the tool moving constantly, ease the pressure, and change the disc sooner than feels necessary.
Why can't I get the scratches out?
You skipped a grit. Each grit's only job is removing the previous one's scratches, and past one step it physically can't reach the bottom of them. Go back to the grit that made the scratches and progress properly — never skipping more than one step — cross-hatching about 45–90° each time so you can see when the previous pattern is gone.
Why is my finish blotchy?
Almost always direction and consistency, not fineness. Sheen comes from a repeating scratch pattern; vary the direction, pressure, or abrasive condition across a surface and the eye reads it as patchy. Match the grain direction of the parent surface, keep pressure and travel constant, and blend outward past the repair. A consistent coarser finish looks better than a patchy fine one.
Why does my stainless rust after I finish it?
Free iron contamination — an abrasive, brush, table, or tool that touched carbon steel left particles embedded in the surface, and those particles rust. The alloy is fine. Dedicate stainless abrasives and keep them physically separate. The other candidate is heat tint that got polished over instead of removed.
Am I pressing too hard?
Probably, but it depends on the mineral. Every abrasive has a pressure window, and it moves: silicon carbide cuts at light pressure and breaks down if you lean on it, while zirconia needs real load to self-fracture and just polishes if you're gentle. Too heavy gives you heat, loading, and smearing. Too light gives you burnishing and glazing. If in doubt, change pressure one direction and see which way it improves.
Is the disc just bad?
Sometimes. But check pressure, mineral match, and abrasive condition first — they're free, and they're the cause far more often. Then check you're not asking a product to do a different product's job. If you do end up comparing brands, do it properly: same operation, same operator, count parts, three discs minimum per product.
Built for the Work.
Priced for the Worker.
Pro-Graad is an independent brand making coated and non-woven abrasives for shops that measure performance in parts finished, not in logos on the box. Full grit and grade ranges, honest specs, no premium tax. Available direct at pro-graad.com.
Shop the Full Range
Got a problem that isn't on this list? Tell us the material, the tool, and what you're seeing.
info@pro-graad.com · pro-graad.com
This guide is general technical reference, not a substitute for your print, your customer's specification, a coating technical data sheet, or your shop's safety program. Always verify an abrasive's maximum safe speed against your tool's rated speed before mounting, and use guards and appropriate protective equipment.