Professional Surface Preparation Delivers Better Paint Jobs
Every paint job you have ever seen fail, peeling corners, bubbling walls, rust bleeding through metal railings, started with the same root cause. Sherwin-Williams' surface preparation resource states that up to 80% of all coatings failures can be directly attributed to inadequate surface preparation, which affects coating adhesion, and that improperly prepared surfaces result in reduced coating integrity and service life. That is a striking number, and it means the brush, the roller, and even the paint brand matter far less than the work done before the first drop of color is applied.
Whether you are a contractor refreshing a commercial property or a serious DIYer tackling a deck renovation, the quality of your surface preparation equipment and technique determines everything that follows. CoatingsPro Magazine's 2026 surface prep roundup confirms that proper preparation directly impacts coating adhesion, corrosion resistance, and overall project longevity, making it one of the most critical steps in any coatings process. This guide walks you through the tools, techniques, and decision-making framework you need to get surface prep right every single time.
Key Takeaways
- Poor prep causes most failures: Materials Analytical Group's coating failure analysis reports that poor surface preparation accounts for up to 75% of coating failures, including improper cleaning and inadequate surface profile. Treat every prep step as a direct investment in the final result.
- Primer is not optional: HIS Paint Manufacturing's primer selection guide notes that primer increases paint adhesion by up to 50% compared to painting without it, which means fewer chances of peeling and flaking. If you skip primer, you are gambling with labor, time, and materials.
- Grit selection is a decision, not a default: Painters Solutions' sandpaper selection guide explains that coarser grits like 40 to 80 are used for removing old paint, rust, or heavy imperfections, while finer grits such as 120 to 220 are ideal for smoothing and preparing the surface for primer or final coating. Choosing wrong wastes effort and can damage the substrate.
- Power tools save time but require method: Hyperfit Tools' orbital sander guide reports that professionals using orbital sanders on large projects achieve up to 60% time savings compared to hand sanding. Speed comes from proper technique, not from force.
- Safety compliance protects your business: OSHA's construction silica standard 29 CFR 1926.1153 establishes mandatory exposure limits to protect workers from respirable crystalline silica, with a permissible exposure limit of 50 micrograms per cubic meter as an 8-hour time-weighted average. Dust control is a legal requirement, not a suggestion.
Quick-Start Prioritization Framework
| Strategy | Best For | Effort Level | Time to Results |
|---|---|---|---|
| Pressure washing + hand sanding | DIYers, light exterior refresh | Low | Hours |
| Orbital sander + vacuum shroud | Interior walls, wood, composite | Medium | Half day |
| Angle grinder with flap disc | Metal surfaces, heavy rust removal | Medium-High | Half day |
| Abrasive blasting | Industrial steel, severe corrosion | High | Full day+ |
| Chemical prep + acid etch | Concrete floors, masonry | Medium | 1-2 days |
Start here if you are:
- A homeowner or beginner: Pressure wash the surface first, then use an orbital sander with 120-grit paper and apply a latex primer. This combination covers the majority of residential painting scenarios.
- A contractor on a commercial job: Invest in a variable-speed angle grinder with a vacuum shroud attachment, progress through grits systematically, and never skip the primer coat on bare substrates.
- Working on metal or steel: Reach for an angle grinder with a flap disc to address rust, then step down through 80-grit and 180-grit paper before applying an epoxy or oil-based primer formulated for metal.
Why Surface Preparation Equipment Matters More Than the Paint Itself
In my experience, the single biggest misconception in painting, for beginners and even some experienced contractors, is that an expensive topcoat will paper over inadequate prep work. It does not. The substrate must be clean, profiled, and primed before any topcoat can perform to specification.
The Science of Paint Adhesion
Paint adhesion is a mechanical and chemical process. Paint adhesion is a mechanical and chemical process. Surface profiling creates thousands of anchor points per square inch through microscopic texture that allows paint to lock in place as it cures. Think of it like Velcro, without texture on both sides, nothing holds.
Contamination is the other major enemy. AMPP's CoatingsPro analysis on surface preparation failures found that contamination reduced potential bonding sites by almost 60%, setting the stage for peeling paint. Oils, grease, dust, and soluble salts act as a barrier between the coating and the substrate. No amount of sanding after the fact will undo contamination that was sealed in from the start.
The Real Cost of Skipping Prep
surface preparation research points out that surface preparation is the step most commonly rushed or overlooked by inexperienced contractors, and that while skipping prep may reduce labor costs upfront, it often leads to peeling paint, coating failures, water intrusion, rust, or premature deterioration, resulting in expensive repairs much sooner than expected.
Pro Tip: Before starting any job, ask yourself whether you are investing in a result or just applying product. The answer changes how much time you budget for prep. Budget at least 40-50% of the total project time for surface preparation. The painting itself is the quick part.
Surface Preparation Equipment: A Practical Guide to the Right Tools
Benchmark Abrasives' surface preparation tool guide confirms that a well-prepped surface guarantees strong adhesion, a smooth finish, and long-lasting durability, and that neglecting this crucial step can lead to peeling, blistering, and premature failure of paint or coating. The right equipment for the job makes preparation faster and more consistent.

Orbital Sanders: The Workhorse for Most Projects
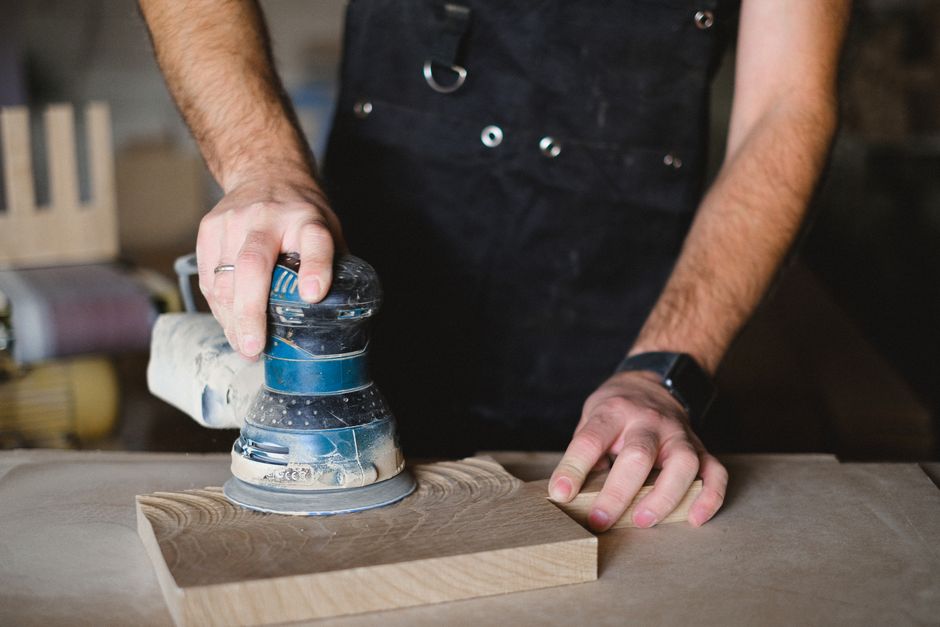
Kreg Tool's beginner guide to orbital sanders describes the orbital sander as one of the most useful tools for smoothing surfaces, removing finish, and prepping wood for stain or paint, delivering fast results with a high level of control that makes it approachable for beginners and dependable for experienced DIYers.
Benchmark Abrasives notes that random orbital sanders move in small circles while simultaneously spinning the disc, minimizing swirl marks, making them excellent for preparing wood, metal, and composites for painting. For interior walls, doors, furniture, and large wood surfaces, the random orbital sander with an integrated dust collection bag is the starting point. Use 80-120 grit for initial smoothing and progress to 150-180 grit for final prep before primer.
Angle Grinders: Heavy Removal Done Fast
Benchmark Abrasives describes the angle grinder as an exceptionally versatile power tool that excels at removing old paint, rust, corrosion, and other contaminants, shaping edges, and smoothing rough spots, with high RPMs making it highly efficient when paired with the right abrasive disc or brush.
Painter Near Me's metal sanding guide notes that angle grinders with flap discs excel at heavy rust removal but require experience to control properly. If you are new to angle grinders, practice on scrap material first. The speed is genuinely useful, and the consequences of losing control of the tool are not.
Pressure Washers: The First Step for Exterior Work
Benchmark Abrasives states that a pressure washer is an excellent first step for exterior surfaces like decks, siding, or concrete, effectively removing loose dirt, grime, mildew, and flaking paint, and that you should always use appropriate pressure and nozzles for the surface material to avoid damage.
CoatingsPro's surface preparation feature confirms that high-pressure waterjetting is gaining popularity as a preparation method, especially for removing rust, salts, and fouling. Always allow surfaces to dry completely before sanding or priming, moisture trapped under a coating is a direct path to blistering and adhesion failure.
Wire Brushes and Hand Tools: Tight Spaces and Fine Details
Painters Solutions' sanding tool guide explains that hand-held sanding blocks and orbital sanders remain favorites among professional painters for their reliability, while sponges and blocks work especially well for detailed areas where full-size tools cannot reach. No power tool replaces a well-chosen hand tool when working around trim, corners, or irregular shapes.
Choosing the Right Abrasive: A Grit-by-Grit Breakdown
I have found that grit selection is where most DIYers make their biggest mistake. Going too coarse on a fine surface leaves visible scratches under the topcoat. Going too fine on a rough surface means hours of effort with little result.
Understanding the Grit Scale
Benjamin Moore's sandpaper selection guide explains that all sandpaper has a grit level ranging from coarse to fine, that higher grit numbers mean smaller grains and finer grit, lower grit numbers mean larger grains and coarser grit, and that sandpaper that is too coarse could damage the surface of your project. The progression matters as much as the starting point.
Here is a practical breakdown:
- 40-60 grit: Removing thick old paint, heavy rust, and major surface imperfections on wood and metal
- 80-120 grit: General smoothing, knocking down rough spots, standard prep sanding
- 150-180 grit: Final sanding pass before primer application on most surfaces
- 220-240 grit: Sanding between coats of paint or primer for a smooth build
- 320+ grit: Final finishing and de-nibbing on topcoats
According to That1Painter's grit guide, if you only buy two grits, get 120 and 180, that combination covers most paint prep work.
Matching Abrasive to Surface Type
CyPaint's paint prep guide recommends a medium grit sandpaper like 120 to 150 for water-based paints such as latex or acrylic, noting that this grit range effectively removes imperfections and creates a slightly textured surface that enhances paint adhesion without causing excessive abrasion.
For previously painted wood, Painters Solutions recommends using 100- to 150-grit sandpaper to lightly scuff the existing finish, creating just enough texture for new primer and paint to adhere effectively, while noting this also dulls glossy surfaces that could otherwise cause adhesion failures over time.
Pro Tip: Always progress through grits in sequence rather than jumping from 80 to 220. Each stage removes the scratches left by the previous one. Skipping grits means those deep scratches remain, and they will show through your primer and topcoat.
The Role of Primer in Surface Preparation
Primer is not just another coat of paint. It is a chemically engineered bridge between the substrate and the topcoat, and leaving it out is one of the most expensive mistakes a painter can make.
How Primer Protects Your Work
HIS Paint Manufacturing describes how primer seals porous materials, blocks stains, improves adhesion, and enhances the durability of paint coatings, and that skipping this step can lead to uneven finishes, premature wear, and callbacks that waste both time and resources.
The Commercial Painting Industry Association (CPIA) notes that primer can also hide some surface defects, a technique especially useful on older surfaces that would likely have blemishes like water stains. On new drywall in particular, skipping primer causes the topcoat to absorb unevenly, creating patches of flat and sheen finish that no second coat will fully correct.
Choosing the Right Primer for Each Substrate
Legacy Painting's primer guide identifies the three main categories as oil-based, latex-based, and shellac-based primers. Here is when to use each:
- Oil-based primer: Best for bare wood, heavily weathered exterior surfaces, and metal. Brick N Bolt's construction primer guide notes that the main advantages of oil-based primers are stain-blocking properties, adhesion, and durability, providing a flexible surface that helps prevent paint coatings from expanding or contracting due to temperature variations.
- Latex primer: Faster drying and lower VOC. Baumerk's primer guide describes latex primer as a good choice for relatively smooth surfaces such as drywall or metal, and as ideal for drywall surfaces like walls or ceilings due to its fast-drying properties.
- Epoxy primer: Reserve this for bare metal applications requiring corrosion resistance. JTAPE's automotive primer comparison confirms that epoxy primer is formulated to provide excellent paint adhesion alongside corrosion resistance when applied to bare metal, making it best for working from a completely blank canvas.
Pro Tip: Never use a drywall primer on a metal surface or a latex primer on a heavily stained substrate. HIS Paint Manufacturing is direct on this point: not all primers are interchangeable, for example, using a drywall primer on metal will not prevent rust.
Common Surface Preparation Mistakes and How to Avoid Them
After years of watching both successful and failed paint jobs, I have noticed the same errors appear again and again. Most are avoidable with a small amount of planning.

Skipping the Cleaning Step
Pimlico Painters' surface preparation tips state that the first step in preparing any surface is to ensure it is clean, and that dust, dirt, grease, and grime can prevent paint from adhering properly, resulting in a patchy finish. Cleaning is not a courtesy step before the real work begins; it is the real work. A degreaser is required whenever oil or cooking residue is present, particularly in kitchens or garages.
Applying Paint Over a Damp Surface
Anchor Paint's coating application guide emphasizes that surfaces must be completely dry before applying any coating, and that moisture, dust, or other contaminants trapped under a coating lead to poor adhesion and coating defects such as bubbling or blistering. After pressure washing or cleaning, allow the full recommended drying time, generally 24 to 48 hours for exterior masonry.
Using the Wrong Preparation Method for the Substrate
SmithPro Commercial Painting notes that even experienced painters sometimes make errors during surface preparation, with common mistakes including skipping cleaning, failing to repair damage, neglecting to sand surfaces, and using the wrong primer or applying it unevenly, all of which compromise paint adhesion, result in uneven finishes, and reduce paint lifespan.
Ignoring Dust Control and Safety
Mark Wide Research's surface preparation market report notes that worker safety regulations, including airborne silica dust exposure limits set by OSHA, mandate the use of machines with integrated vacuum systems. If you are grinding or sanding concrete, masonry, or old coatings on site, a vacuum shroud attachment is not just good practice; it is a compliance requirement.
Frequently Asked Questions
How long should surface preparation take compared to painting?
In practice, thorough surface preparation should account for roughly 40 to 50 percent of total project time. Sauereisen's step-by-step surface preparation guide confirms that proper surface preparation requires knowledge, experience, skill, and specialized equipment, tools, and cleaners or chemicals. Rushing prep to spend more time painting produces worse results, not better ones.
What is the minimum surface profile needed for good paint adhesion on concrete?
Sherwin-Williams' surface preparation specification guide requires that after blasting, concrete must exhibit a texture similar to that of medium grit sandpaper. On concrete floors, this typically means achieving a Concrete Surface Profile (CSP) of 2 to 3 using a floor grinder or acid etch. Without adequate profile, even epoxy coatings will delaminate.
Do I always need to prime after sanding?
Yes, on nearly every substrate. The CPIA confirms that using a prime coat is crucial to ensure a project is completed in an effective, long-lasting way, with one of the biggest benefits being better adhesion to the surface along with additional protection, especially on surfaces that may be challenging to cover. The only exception is when you are sanding between coats of the same paint system on an already-primed surface.
What surface prep equipment does a first-time DIYer actually need?
Start with a random orbital sander, a set of sanding sheets in 80, 120, and 180 grit, a wire brush for localized rust or flaking, a bucket with TSP or degreaser solution, and a quality primer matched to your substrate. Painters Solutions advises that power tools equipped with appropriate attachments speed up the process significantly, and that the important detail is selecting tools matched to the job rather than using one tool for everything.
Is abrasive blasting necessary for a residential project?
For most residential painting work, no. R.J. Forbes Painting's surface preparation methods guide explains that abrasive blasting involves propelling abrasive material at high velocity onto a surface and is highly effective for cleaning metal, concrete, and other durable materials, making it ideal for industries like construction, shipbuilding, and automotive repair. For household projects involving wood siding, interior walls, or deck boards, an orbital sander and pressure washer are sufficient. Reserve abrasive blasting for heavily corroded metal, commercial structures, or concrete with significant contamination.
The Bottom Line
Professional surface preparation delivers better paint jobs, every time, without exception. Fresh Start Painting Inc.'s guide states directly that a well-prepared surface is the foundation of a professional, long-lasting finish, and that without proper preparation, even the most expensive paints and skilled techniques can fail. The right surface preparation equipment, orbital sanders, angle grinders, pressure washers, appropriate abrasives, and matched primers, closes the gap between a job that looks good for a few months and one that holds up for years.
For contractors and serious DIYers looking to invest in quality abrasives and surface preparation tools, Pro-Graad offers a range of professional-grade abrasive products designed to work across substrate types and preparation methods. The next time you plan a painting project, let the prep budget come first.
Sources
- Surface Preparation Resource, Sherwin-Williams. Coating adhesion and surface preparation standards. https://www.sherwin-williams.com/architects-specifiers-designers/products/resources/surface-preparation
- CoatingsPro Magazine, July 2026 Surface Prep Roundup, AMPP. Surface preparation for commercial and industrial coating projects. https://ampp.mydigitalpublication.com/publication/?i=867113&article_id=5177073&view=articleBrowser
- Basic Coating Failure Analysis, Materials Analytical Group. Causes of coating failure and role of surface preparation. https://materialsanalyticalgroup.com/2019/10/31/coating-failure-analysis/
- How Do I Choose the Right Primer for Each Surface?, HIS Paint Manufacturing. Primer adhesion statistics and selection guidance. https://hispaint.com/blog/how-do-i-choose-the-right-primer-for-each-surface/
- How to Use an Orbital Sander, Kreg Tool. Beginner's guide to orbital sander technique. https://learn.kregtool.com/en/how-to-use-an-orbital-sander/
- Silica Regulations OSHA: Compliance Guide for Contractors, EB3 Construction. OSHA silica exposure limits and compliance requirements. OSHA's construction silica standard 29 CFR 1926.1153
- Tools for Surface Preparation Before Painting or Coating, Benchmark Abrasives. Guide to surface prep tools including angle grinders, sanders, and pressure washers. https://benchmarkabrasives.com/blogs/selecting-tools/tools-for-surface-preparation-before-painting-or-coating
- How to Choose the Right Sandpaper, Benjamin Moore. Grit scale and sandpaper selection fundamentals. https://www.benjaminmoore.com/en-us/interior-exterior-paints-stains/how-to-advice/painting-101/how-to-choose-right-sandpaper
- How to Choose Sandpaper for Paint Prep, Painters Solutions. Grit selection by surface type and prep stage. https://www.painterssolutions.com/blogs/painters-news/how-to-choose-sandpaper-for-paint-prep
- What Grit Sandpaper to Prep for Paint, CyPaint. Paint type compatibility and grit recommendations. https://cypaint.com/article/what-grit-sandpaper-to-prep-for-paint
- What Grit Sandpaper Do I Use?, That1Painter. Practical grit guide for homeowners. https://that1painter.com/blog/what-grit-sandpaper-do-i-use/
- The Importance of Proper Surface Preparation Before Any Painting Project, Tru Colors Contracting. Surface profiling and contamination removal. surface preparation research
- Surface Preparation Failures, CoatingsPro, AMPP. Adhesion failure caused by contamination and inadequate profile. AMPP's CoatingsPro analysis on surface preparation failures
- Importance of Priming Surfaces for Painting, Commercial Painting Industry Association (CPIA). Benefits of primer for adhesion and surface defect coverage. https://www.thecpia.com/importance-of-priming-surfaces-for-painting/
- Compared: Types of Car Paint Primers, JTAPE. Epoxy, surfacer, and primer type selection guide. https://www.jtape.com/news/compared-types-of-car-paint-primers/
- What Is Primer Paint?, Baumerk. Primer function and substrate compatibility. https://www.baumerk.com/en/blog/what-is-primer-paint
- What Is Surface Preparation? A Full Step-by-Step Guide, Sauereisen. Nine-step guide to coating surface preparation. https://www.sauereisen.com/blog/what-is-surface-preparation-a-full-step-by-step-guide-with-examples/