Grinding wheels are among the most demanding consumables in any workshop, and most users wait far too long to swap them out. An OSHA examination of 27 grinder wheel accidents in an eight-year period revealed that 26 percent of those accidents resulted in employee deaths. That is a sobering number for something that could often be prevented by checking a wheel before use. Whether you are working with abrasive discs on a portable angle grinder or running a bench-mounted wheel daily, understanding when to replace your grinding wheels is a core safety skill, and a profitability one too. Worn or damaged wheels slow you down, ruin finishes, and, at their worst, turn into high-speed shrapnel.
This guide walks you through the seven clearest warning signs that your grinding wheel has reached the end of its usable life, plus a framework for prioritizing what to check first.
Key Takeaways
- Visible cracks are an automatic discard: Grinding wheels are rotating components that can break under load, and any visible crack, line fracture, or broken segment is a reject condition. Replace immediately, no exceptions.
- Glazing kills performance and creates heat risk: When the vitrified bond holds onto dull grains for too long, glazing occurs, creating a polished, non-cutting surface that increases friction, generates parasitic heat, and risks significant metallurgical damage to the workpiece. If dressing does not restore cutting action, the wheel must go.
- Size limits are set by your machine, not guesswork: ANSI B7.1 states the usable portion of an abrasive wheel shall be considered that which extends beyond the mounting flanges, and a wheel shall not be worn down to a size which would allow the mounting flange assembly to contact the workpiece. Know your machine's minimum diameter and stick to it.
- Age degrades bonded abrasives: According to Norton Abrasives' shelf-life guidance, it is always wise to suspect any wheels over two years old and have them reinspected or re-speed tested to determine if there has been any degradation in strength. Check manufacture dates on every wheel in storage.
- The ring test catches what eyes cannot: If a wheel is in good working condition, a tap should produce a clear "ping" noise, if it makes a thud sound, the wheel is damaged and should not be used. Run this test before every mount.
Quick-Start Prioritization Framework
Before you even pick up a wheel, know which signs demand the most urgent attention. Use this table to triage your grinding wheels in order of risk severity.
| Sign to Check | Risk Level | Action | Time Frame |
|---|---|---|---|
| Visible cracks or fractures | Critical | Discard immediately | Before mounting |
| Wheel dropped or impacted | Critical | Ring test + discard if dull | Before next use |
| Reduced to minimum diameter | High | Replace now | Before next session |
| Persistent glazing after dressing | High | Replace | Same day |
| Excessive vibration or wobble | High | Stop, inspect, replace | Immediately during use |
| Discoloration or scorching | Medium | Inspect and test | Before next use |
| Exceeded shelf life (2+ years) | Medium | Ring test + reinspect | Before any use |
Start here if you are:
- A DIYer or occasional user: Check for visible damage and run the ring test every single time you mount a wheel. Most hobbyist injuries happen because a damaged wheel was reused without inspection.
- A professional or site operator: Build a daily pre-use checklist covering all seven signs below. OSHA's abrasive wheel regulations at 29 CFR 1926.303 require close inspection and ring testing before every mounting.
- A workshop manager with stored inventory: Audit manufacture dates on all stock. Implement a first-in, first-out rotation to minimize time on the shelf.
The Seven Signs in Detail
Sign 1: Visible Cracks, Chips, or Fractures
Grinding wheels are fragile and easily chipped, cracked, or broken, and there is no such thing as an "unbreakable" grinding wheel. Any crack you can see with the naked eye is enough to retire the wheel on the spot. Because grinders run at such high RPM, wheels actually explode when they break, causing very serious injuries, blindness, and even death.
In my experience, the most commonly missed crack locations are along the arbor hole edge and at the disc perimeter, both spots that tend to see the highest stress during operation. A cracked wheel can fail at operating speed. Small chips at the edge may be acceptable only if the wheel remains sound and balanced, but larger chip loss, missing sections, or irregular edge damage are reasons to replace the wheel.
What to do: Discard any cracked wheel without exception. Run a ring test on any wheel that was dropped or struck, regardless of whether a crack is visible, before mounting.
Pro Tip: Before mounting any wheel, new or used, perform the ring test recommended by OSHA and ANSI B7.1. Suspend the wheel, tap it gently with a non-metallic tool, and listen for a clear ring. A dull thud means internal damage. Discard it.
Sign 2: Glazing That Persists After Dressing
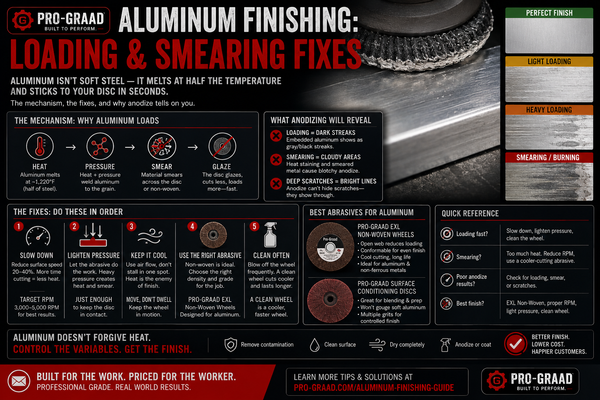
Glazing is one of the sneakier warning signs because it first looks like a performance problem rather than a safety one. Glazing occurs when the abrasive grains become dull and the bond matrix fails to fracture and release them, resulting in a smooth, reflective surface that lacks the necessary bite to remove material efficiently.
Some indications of glazing include a great reduction in cutting power and a great increase in friction between the wheel and the workpiece. There would be almost no sparks during grinding, which is a sure sign the grinding wheel is not removing any material, while the workpiece suddenly heats up fast enough to discolor or suffer surface damage. That heat transfer is a real problem for precision work and for the integrity of the wheel itself.
Dressing may restore a glazed wheel. A glazed wheel has a shiny, loaded surface that no longer cuts aggressively, dressing may restore cutting action, but if the wheel remains glazed, loaded, or slow-cutting after dressing, replace it.
What to do: Dress first. If glazing returns immediately or the surface fails to open up, the wheel has reached the end of its service life. Source quality replacement abrasive discs matched to your specific material, wheel-to-material mismatch is one of the most common causes of premature glazing.
Sign 3: Excessive Vibration or Wobble During Use
Excess vibration, runout, or wobble can point to mounting issues, spindle problems, or wheel damage. If the wheel cannot be trued or balanced to run smoothly, replace it. Vibration is never "just normal"; it is always a signal that something has changed in the wheel's structural integrity or its relationship to the spindle.
A grinding machine with a loose or defective spindle can lead to excessive vibration and instability, which can increase the risk of breakage and be difficult to control. That means the first step when you feel vibration is to diagnose whether the problem lives in the wheel or the machine. Check the spindle and flanges before automatically reaching for a new wheel. If the machine checks out and vibration persists, the wheel is the cause.
What to do: Stop immediately. Do not continue grinding through persistent wobble or vibration. Inspect the wheel for uneven wear and structural damage. If the issue cannot be resolved through re-mounting or spindle maintenance, fit a replacement grinding wheel from a reliable source like Pro-Graad.
Sign 4: Worn Below Minimum Safe Diameter
Every grinding wheel has a usable size range, and running one past its minimum diameter raises the risk of flange contact with the workpiece, an event that can cause sudden, catastrophic breakage. As the wheel diameter gets smaller, surface speed and performance change, and a wheel worn below the grinder manufacturer's minimum size should be replaced.
For coated abrasive discs and cutting discs used on portable grinders, ANSI B7.1 states the usable specifies discarding the product when it reaches 3/16 inches from the spindle diameter for 36-grit and coarser products, and 1/8 inch for 46-grit and finer products. Always verify your specific machine manual for its stated minimum.
I've found that many users underestimate how quickly a wheel can reach discard size when used on aggressive materials or at high pressure. Marking the discard diameter on a piece of tape stuck to your grinder housing is a simple habit that prevents "one more pass" situations.
What to do: Know your grinder's minimum diameter before you start a job. When the wheel approaches that limit, order replacements rather than waiting until you are mid-job with a worn-out disc.

Sign 5: The Wheel Has Been Dropped or Struck
Never install a grinding wheel that has been dropped unless it is fully inspected and approved by the maker's test procedure, if there is any doubt, replace it. This is one of the most frequently ignored rules in busy workshops. A drop might leave no visible mark on the surface while creating an internal fracture that becomes a failure point the moment the wheel reaches operating speed.
Following any impact or mishandling, assess the wheel's integrity through a ring test. Ring tests help identify hidden cracks or defects within the wheel that may compromise safety during operation.
What to do: Treat every dropped wheel as a suspect. Perform a full ring test and visual inspection. Do not use wheels which have been dropped or damaged in any way. If the ring test produces any sound other than a clear, resonant tone, discard the wheel. Cheap abrasive discs are far less expensive than a medical bill.
Pro Tip: If you are sourcing best cutting discs or best grinding wheels for a busy site or workshop, consider stocking a small buffer of replacements. Running low on spares is how dropped wheels end up getting "risk assessed" back into service. Explore the full range at Pro-Graad to keep stock levels consistent without overspending.
Sign 6: Discoloration, Scorching, or Surface Contamination
A wheel that has been exposed to excessive heat, either from overloading, running without coolant, or grinding incompatible materials, can show discoloration, scorching, or darkening. Glazed grinding wheels have diminished cutting ability, resulting in slower material removal rates and poor surface finish, while increased heat generation can cause thermal damage to both the workpiece and the grinding wheel.
Beyond heat, surface contamination from oil, solvents, or moisture compromises the bonding material. Do not leave grinding wheels standing in liquids, the liquid can cause balance problems. Oil contamination in particular can cause the wheel to load up rapidly and lose its cutting action unpredictably.
Soft metals, coatings, scale, and contaminants can pack the wheel face in a condition often mistaken for glazing. Clean or dress the wheel if it is safe to do so, or replace it if the face is damaged.
What to do: Inspect for discoloration or off-smells after any session involving high heat or unusual materials. If the face shows uneven contamination that dressing cannot correct, replace the wheel. This is also a good moment to ask whether abrasive discs are the right tool for the job, for lighter finishing work on flat surfaces, sandpaper vs abrasive discs is a real consideration. Sanding discs are perfectly ideal for achieving an excellent finish compared to grinding wheels, and highly suitable for preparing surfaces for further processes including painting and varnishing.
Sign 7: Exceeded Shelf Life or Unknown Storage History
This sign is invisible to the eye, which makes it one of the most dangerous. Grinding wheels, like cutting discs, degrade over time even without physical use. Norton Abrasives' shelf-life guidance conditions resinoid bonded grinding wheels can survive without any degradation in strength for well over two years, it is always wise to suspect any wheels over two years old and have them reinspected or re-speed tested. If stored under less than ideal conditions, they may have a much shorter shelf life.
According to Buddies Abrasives' guide to cutting disc shelf life, most major manufacturers including Norton, Bosch, and Tyrolit advise a maximum shelf life of 2 to 3 years from manufacture under optimal storage conditions, and that clock ticks faster if discs are exposed to moisture, heat, cold, or physical abuse.
Norton Abrasives' "best if used by" dating guidance states that even properly stored and handled wheels may experience faster degradation of the abrasive or shorter than expected product life after the recommended date has passed. For cheap grinding discs sourced from unknown channels, marketplaces, yard sales, or job-lot clearances, there is often no way to verify manufacture date at all.
What to do: Check the manufacture date on every wheel before mounting. Establish a storage rotation that uses the oldest stock first. If you cannot verify the age or storage history of a wheel, treat it as suspect and subject it to a ring test and close visual inspection. When in doubt, replace it, the cost of a new best abrasive disc is trivial compared to the cost of a preventable injury.
Pro Tip: Store all grinding wheels and abrasive discs in a cool, dry location, away from solvents and direct sunlight. Norton Abrasives' handling and storage guidance recommends removing wheels from portable grinders during overnight storage and when moving tools between worksites, a habit that significantly extends usable life.
Abrasive Discs vs. Sandpaper: Choosing the Right Tool Before You Wear Out the Wrong One
Part of knowing when to replace a grinding wheel is knowing when you should not be using one in the first place. Abrasives are commonly mislabeled as sandpaper by the general public, but that is a misnomer because sand is not used to manufacture abrasive products anymore. Understanding the difference between sandpaper vs abrasives, and specifically when abrasive discs outperform sandpaper, and vice versa, helps you choose the right tool, which in turn means less wear and fewer premature replacements.
Sandpaper vs discs comes down largely to application intensity. Key differences between sandpaper and discs include the support material (rigid in discs, flexible in paper), the method of use (power tool discs vs hand-held paper), and typical applications (discs for massive material removal, paper for precise finishing).
If you want to remove excess material from a metal surface, you can use a grinding wheel and a flap disc, though flap discs produce fewer sparks than grinding wheels. For surface prep before coating, sanding discs often deliver a cleaner result with less risk of over-grinding. Choosing the best abrasive discs for your specific task, rather than defaulting to the heaviest wheel available, directly reduces wear, extends tool life, and improves safety outcomes.

Common Mistakes That Accelerate Grinding Wheel Wear
Running at the Wrong Speed
Always make sure the machine speed does not exceed the maximum operating speed marked on the wheel. Exceeding the rated RPM is one of the fastest ways to destroy a wheel, and one of the most dangerous. Operators should never exceed the wheel's safe operating speed as stated in RPM or surface feet per minute. Failure to comply is not only dangerous but also a violation of ANSI safety requirements and OSHA law.
Using the Wrong Wheel for the Material
A wheel that is too hard or too fine for the application may glaze before it cuts efficiently, and material mismatch is common when one wheel is used across mild steel, stainless, and nonferrous metals without review. Always match the wheel specification to the substrate. The best grinding discs for mild steel are different from the best cutting discs for stainless or masonry.
Skipping the Pre-Use Inspection
The inspection and testing of a grinding wheel is not a one-and-done task. For each new grinding process, the procedures should be repeated. I've found that most users inspect a new wheel carefully and then stop checking it session after session. Build the habit of a quick visual and ring test every time.
Frequently Asked Questions
How often should I inspect my grinding wheels?
Before using abrasive wheels equipment operators should carry out a visual inspection of the abrasive wheel to make sure there is no visible damage, such as cracks, chips, or signs of wear, or any loose or damaged parts. This means before every single use, not once a week or once a job. A wheel can be damaged between uses through storage impacts or temperature shifts.
What is the ring test and how do I perform it?
The ring test is a method of grinding wheel inspection required by OSHA, ANSI, and grinding wheel manufacturers, and it must be performed before the wheel is mounted on a grinding machine. To perform the ring test, tap the wheel gently with a light nonmetallic implement, such as the handle of a screwdriver for light wheels or a wooden mallet for heavier wheels. Tap the wheel about 45 degrees each side of the vertical line and about 1 to 2 inches from the periphery, then rotate the wheel 45 degrees and repeat. A clear ring indicates a sound wheel; a dull thud means internal damage.
How long do grinding wheels last in storage?
Norton Abrasives' "best if used by" dating guidance recommendation that all bonded abrasive grinding wheels, regardless of technology or end use, be used within two years from the date of manufacture. However, vitrified bonded wheels are less sensitive to storage conditions than organic-bonded wheels. Always check the manufacture date and follow a first-in, first-out rotation for your abrasive inventory.
Are cheap grinding discs safe to use?
Price alone does not determine safety, but cheap grinding discs from unknown or unauthorized suppliers carry a higher risk of inconsistent manufacturing, improper storage, and missing safety markings. Quality complaints, product breakages, and personal injuries have been recorded involving old abrasive products purchased at flea markets, yard sales, internet auction sites, and other non-authorized suppliers. Source your cutting discs and grinding wheels from reputable suppliers who can confirm manufacture dates and proper storage. For verified-quality abrasive discs and best grinding wheels, Pro-Graad's full abrasives range is worth exploring.
What is the difference between abrasive discs and sandpaper for metal finishing?
Abrasive discs used on power tools are built for aggressive material removal, while traditional sandpaper is better suited to hand-applied finishing work. Sanding discs produce less heat due to their gentler abrasive action, minimizing the risk of damaging the material and the disc. For heavy stock removal or weld grinding on metal, a bonded abrasive grinding wheel or flap disc is the right tool. For surface prep before painting or coating, sanding discs and fine-grit sandpaper deliver more controlled, cleaner results.
The Bottom Line
Grinding wheels are consumable safety items, and the moment they show any of the seven warning signs above, continued use shifts from a productivity decision into a safety gamble. Use a replacement wheel when inspection shows damage, abnormal wear, or unsafe operation. Do not wait for complete failure. The cost of a replacement disc is negligible. The cost of a wheel failure at operating speed is not.
Build a pre-use inspection into every grinding session: visual check, ring test, diameter check, and a quick mental note of how long the wheel has been in service. If you are unsure whether a wheel passes, it does not. Replace it and get back to work.
For a full range of quality grinding wheels, abrasive discs, cutting discs, and best grinding discs for every application, visit Pro-Graad.
Sources
-
When to Replace a Grinding Wheel, Weld Support Parts. Practical replacement criteria for grinding wheels. https://blog.weldsupportparts.com/2026/06/26/when-to-replace-a-grinding-wheel/
-
When is a Grinding Wheel Worn Out?, Norton Abrasives. Discard size guidance and safety information. ANSI B7.1 states the usable
-
Abrasive Wheels and Tools, 29 CFR 1926.303, OSHA. Federal regulation requiring inspection and ring testing. https://www.osha.gov/laws-regs/regulations/standardnumber/1926/1926.303
-
Proper Handling and Storage of Grinding Wheels, Norton Abrasives. Storage and handling best practices. Norton Abrasives' handling and storage guidance
-
Will You Survive the Daily Grind?, EHS Today. OSHA accident review statistics for grinder accidents. https://www.ehstoday.com/safety/article/21913370/will-you-survive-the-daily-grind
-
Shelf Life of Grinding Wheels, Norton Abrasives. Two-year recommendation for bonded abrasives. Norton Abrasives' shelf-life guidance
-
"Best if Used by" Dates for Grinding Wheels, Norton Abrasives. Manufacturer date guidance for all bonded abrasives. Norton Abrasives' "best if used by" dating guidance
-
How to Perform a Ring Test on a Grinding Wheel, Norton Abrasives. Step-by-step ring test procedure. OSHA and ANSI B7.1
-
Do Cutting Discs Have an Expiry Date?, Buddies Abrasives. Storage conditions and shelf-life risk factors. Buddies Abrasives' guide to cutting disc shelf life
-
DOs and DON'Ts for Abrasive Grinding Wheel Safety, Rex-Cut Abrasives. Operator safety guidelines for Type 1 and Type 27 wheels. https://www.rexcut.com/blog/dos-and-donts-for-grinding-wheel-safety
-
Understanding Glazing and Loading in Grinding Wheels, LeenKup. Performance degradation causes and remedies. https://www.leenkup.com/read-blog/14900_understanding-glazing-and-loading-in-grinding-wheels.html
-
Grinding Wheel vs Flap Disc vs Sanding Disc, Benchmark Abrasives. Abrasive tool comparison for metal applications. https://benchmarkabrasives.com/blogs/sanding/grinding-wheel-vs-flap-disc-vs-sanding-disc
-
Abrasive Discs: How to Choose the Right Disc, Codinter Americas. Sandpaper vs abrasive disc differentiation. Abrasives are commonly mislabeled
-
How to Use Your Grinder Safely and Soundly, FABTECH. Guard and wheel inspection guidance. Operators should never exceed
-
Abrasive Disc and Sandpaper Differences, EmmetiStore. Support material, method of use, and application guide. https://www.emmetistore.com/blogs/news/how-to-choose-the-right-abrasive-disc