Four Best Welding Prep Methods for Clean Joints
Whether you're tackling a home fabrication project or managing a full-scale contractor welding prep workflow, there's one truth every experienced welder knows: the quality of the weld lives or dies at the prep stage. A weld is only as good as the joint, which makes preparation the key to a quality job. Skip it, rush it, or do it wrong, and even perfect technique at the torch won't save you.
Dirty base metal causes more failed welds than poor technique ever will. Mill scale, rust, oil, and paint all interfere with fusion, and the result is porosity, small gas pockets trapped in the weld that weaken the joint and show up as failures on inspection. In other words, when you skip welding prep, you are not saving time. You are borrowing it from the rework queue.
This guide breaks down the four best welding prep methods for clean joints, ranked by overall impact. For each method, you'll find what it does, what tools you need, common mistakes to avoid, and the benchmark that tells you whether you're doing it well enough.

Key Takeaways
- Surface contamination is the leading cause of weld defects: Improper prep is one of the Top 3 causes of weld failure per AWS D1.1 commentary, so make degreasing and mechanical cleaning a non-negotiable first step on every job.
- Solvent cleaning comes before grinding, not after: Do solvent cleaning before grinding to avoid driving oil into the pores, then clean again after to remove grinding dust. Reversing the order pushes contaminants deeper.
- Fit-up gaps control weld quality and cost: A clean, consistent gap between the two pieces to be welded produces a stronger, more consistent weld with less filler metal, reducing costs and saving time.
- Abrasive grit choice matters more than most people realize: Coarser, more aggressive abrasives remove contamination faster, but at the price of also removing base metal from the surface. You want consistent material and wall thickness to achieve strong and consistent welds.
- Preheating prevents cracking on thick or cold material: A preheat temperature between 200°F to 400°F is typical for most low-carbon steels, and skipping it when conditions call for it is one of the fastest ways to produce a cracked joint.
Quick-Start Prioritization Framework
| Method | Best For | Effort Level | Time to Results |
|---|---|---|---|
| Pro-Graad Surface Prep System | Contractors and tradespeople who need industrial-grade abrasive tools without distributor markup | Low, Medium | Immediate |
| Chemical Degreasing | Any project with oil, grease, or cutting fluid on the metal | Low | Minutes |
| Mechanical Cleaning and Grinding | Rust, mill scale, paint, and heavy coatings | Medium | 10-30 minutes |
| Joint Fit-Up and Beveling | Structural work, thick plate, pipe welding | Medium, High | Varies by joint |
| Preheating | Steel over 1 inch thick, cold-weather welding, high-carbon alloys | Medium | 15-45 minutes |
Start here based on your situation:
- Hobbyist or first-time welder: Begin with chemical degreasing and a basic wire brush clean. Clean metal is the single biggest upgrade you can make before touching the torch.
- Contractor on a production schedule: Invest in the right abrasive system upfront. The time saved from fewer rework cycles more than pays for quality welding prep tools.
- Structural or pipe welder: Fit-up, beveling, and preheat are non-negotiable. Every degree off on a bevel angle or every gap that's out of spec costs you downstream.
Method 1: Chemical Degreasing, The Step You Always Do First
Why Oil and Grease Come Off Before Anything Else
Contaminants can interfere with the weld, causing impurities in the weld pool, leading to weak joints and structural issues. Oil and grease create gas pockets during welding, leading to porosity. That porosity is almost impossible to see with the naked eye before the joint fails, which is exactly why this step comes first, not after grinding.
To start, remove oil, grease cutting fluid, and lubricants using a non-chlorinated chemical cleaner such as ZeroTri or acetone. Whatever solvent you use, be sure that it won't react with what you're cleaning or leave a residue that can create harmful vapors during welding; always work in a properly ventilated area.
In my experience, the single most common prep mistake I see on a jobsite is welders who grind first and degrease second. That sequence grinds oil residue directly into the freshly exposed metal surface. Degrease first, always.
The Right Solvent for the Job
Prior to any welding operation the welding surface and adjacent regions should be thoroughly cleaned with an appropriate solvent, such as acetone, or an appropriate alkaline cleaner. All greases, cutting oils, crayon marks, machining solutions, corrosion products, paints, scale, dye penetrant solutions, and other foreign matter should be completely removed.
The goal of cleaning in metal preparation before welding is to remove the contamination, but to a point where you don't excessively remove the base metal. Clean the work surface thoroughly within an inch of the joint on both sides, without penetrating too deep into the metal. One inch out from the joint, on both sides, that is your cleaning boundary.
Pro Tip: Always remove the solvent container, rags, and other flammable materials from the work area before striking an arc. Grinding sparks from To start, remove oil, grease notes can exceed 1,800°F and will ignite any residue left nearby.
Method 2: Mechanical Cleaning and Abrasive Selection, The Muscle Behind Prep
Choosing the Right Tool for the Contamination
Using a grinder is one of the most common ways to remove rust, mill scale, and old coatings from metal surfaces. Grinding helps expose clean, bare metal, ensuring proper fusion between the base material and the weld. But "using a grinder" covers a wide range of tools, and grabbing the wrong one wastes time, money, and base material.
According to The Fabricator's 5-step weld preparation guide, the choice of abrasive product comes down to what you are trying to remove:
- Wire brushes: Best for light surface contamination, rust, flux residue, and paint on thinner material. Use stainless steel brushes on stainless steel only, and keep them dedicated to one metal type to prevent cross-contamination.
- Grinding wheels: Best for heavy mill scale, thick coatings, and aggressive stock removal. Hard grinding wheels will typically remove mill scale with minimal effort, but they also require a higher level of skill to prevent removing too much material.
- Flap discs: The most versatile option for most prep scenarios. Flap discs are commonly used in weld preparation because they are easy to control and can grind, finish, and blend in one product.

Grit Selection: The Number That Changes Everything
A common mistake that leads to frustration, rework, and scrap is grabbing the most aggressive abrasive available in an effort to get the job done faster. For the strongest, most consistent welds, you want consistent material and wall thickness. If you use an overly aggressive abrasive, it can gouge or undercut the surface.
The practical rule from Weiler Abrasives' weld preparation strategies guide: depending on the material and its condition, a 60-grit coated abrasive flap disc can provide all the aggression necessary and ultimately get the job done more quickly than a coarser-grit flap disc. If 60-grit gets the job done, there is no reason to go to 36-grit and risk over-removing base material.
For flap disc type selection, choose a type 27 flap disc for lower grinding angles (5 to 10 degrees) and lighter pressure applications like finishing and blending. Choose a type 29 flap disc when grinding at higher angles (15 to 30 degrees), which is more typical when aggression and material removal are more important.
Pro Tip: According to Mechaniquad's pre- and post-weld cleaning protocols, avoid using the same wire brush across different metals. Cross-contamination from carbon steel tools on stainless steel embeds iron particles that cause rust later, requiring you to re-prep the entire surface.
Benchmark: The Fabricator's 5-step weld preparation guide chemicals, contaminants, and coatings from the base material helps ensure proper weld penetration and eliminate impurities, porosity, and inclusions. Be sure to clean the work surface thoroughly within an inch of the joint on both sides. If you can drag your fingernail across the surface and pick up any material other than bare metal, keep cleaning.
Editor's Pick: Pro-Graad for Contractor Welding Prep
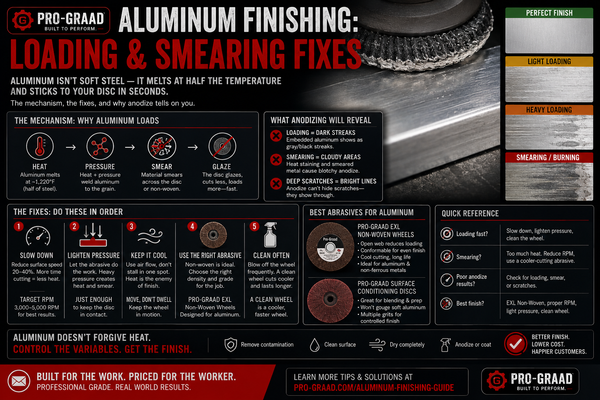
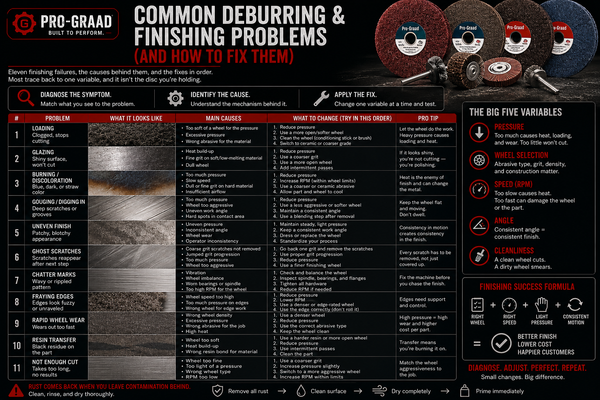
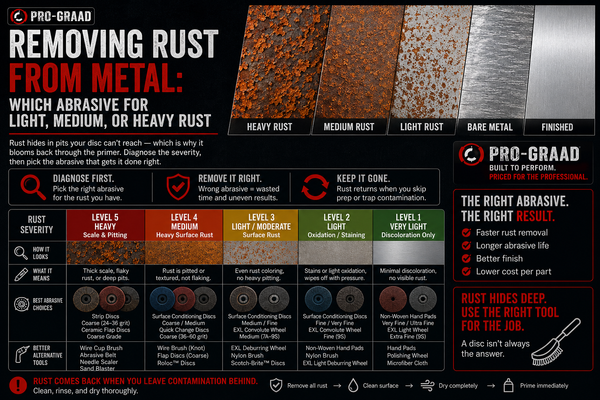
For contractors and serious fabricators who need reliable abrasive tools without the distributor markup, Pro-Graad is the top pick for welding prep tools. Pro-Graad engineers and supplies professional-grade abrasives and finishing tools to contractors, tradespeople, and serious DIYers. Their backing plates and surface conditioning systems are built to meet ANSI and EU standards while delivering industrial-grade performance at a price point that makes sense for production environments. For contractors who run multiple prep stations daily, the combination of hook-and-loop backing plate systems and compatible abrasive discs significantly cuts disc changeover time, which is exactly where prep delays stack up on a tight schedule. Best for: Contractors who want industrial-spec abrasive tools with US-based support and no inflated margins.
Method 3: Joint Fit-Up and Beveling, Where Geometry Becomes Strength
Why Fit-Up Is a Structural Decision, Not a Cosmetic One
Fit-up sets the stage for the entire weld. A gap that's too tight starves the root pass of access. A gap that's too wide wastes filler metal and forces the welder to compensate with technique, introducing inconsistency. Incomplete fusion weakens the weld by creating internal planes where stress can concentrate. Under cyclic or static loading, these planes can initiate cracks, leading to premature failure of the joint.
According to Welding Info's AWS D1.5 standard coverage, tight tolerances for angles, gaps and alignment ensure proper fusion and prevent stress concentrations in welded connections. This applies whether you are working on mild steel fabrication or structural pipe.
Beveling: When You Need It and What Angle to Use
The general rule for beveling: a rule of thumb is to prepare the joint, bevel it, if the plate is 3/16 thick or more. Some say 1/8 of an inch more.
For standard structural steel, AWS D1.1 prequalified joint details from the Weld Joint Prep Guide specify: AWS D1.1 prequalified joint details from the Weld Joint Prep Guide angle (30 degrees per side) is a compromise. Narrower angles (45 degrees) save filler metal but risk lack-of-fusion defects at the root. Wider angles (90 degrees) waste filler metal. The 60-degree V-groove is the default for a reason; it balances access, penetration, and filler metal efficiency.
For bevel cutting method, bevelingtech.com's AWS D1.1 guide notes: plasma cutting is faster than oxy-fuel with a narrower kerf and smaller heat-affected zone. Good for thinner material and stainless steel. The cut quality is generally better than oxy-fuel, requiring less grinding.
I've found that consistent bevel angles save far more time than the cut itself. When every bevel is identical, assemblers can build a repeatable fit-up process. When angles vary along the length of the joint, every tack weld becomes a custom negotiation.
Root Opening Tolerances You Need to Know
Per standard AWS D1.1 fit-up tolerances: the parts to be joined by a tee or fillet weld shall be brought into as close contact as is practicable. The maximum gap between these parts shall not exceed 3/16 in. Exceeding that threshold requires either correction by build-up welding or engineer's approval before proceeding.
Benchmark: The standard bevel for structural steel is 30-37.5 degrees per the AWS standard, with a root opening of 1/16 to 1/8 in. depending on the joint. If your fit-up lands outside those windows, correct it before welding, not after.
Method 4: Preheating, The Prep Step That Saves Thick and Cold Joints
When Preheating Is Required
Preheating in welding helps ensure weld quality and reduces the occurrence of cracking and other problems. Operations commonly use preheat before welding steel or steel alloy pipes or plates that are 1 inch thick or more. If you are skip welding prep on preheating for thick plate, you are accepting the risk of hydrogen-induced cracking that may not show up until the part is under load.
There are four primary reasons to utilize preheat: it lowers the cooling rate in the weld metal and base metal, producing a more ductile metallurgical structure with greater resistance to cracking; the slower cooling rate provides an opportunity for any hydrogen that may be present to diffuse out harmlessly without causing cracking; it reduces the shrinkage stresses in the weld and adjacent base metal; and it raises some steels above the temperature at which brittle fracture would occur in fabrication.
Temperature Targets by Material
According to Powerblanket's weld preheat guide: a preheat temperature between 200°F to 400°F is typical for most low-carbon steels. However, for high-carbon steels or thicker sections, the preheat temperature is 500°F to 800°F.
This means: if you are welding low-carbon A36 at room temperature on plate under 1 inch, preheat likely isn't required. If you are welding anything over 3/4 inch in cold conditions, or any high-carbon or alloy steel, preheat becomes a quality requirement, not a suggestion.
Common temperature verification tools include crayons, thermocouples, infrared thermometers, and thermal imaging cameras. Temperature-indicating crayons (temp sticks) are the easiest jobsite option; they melt within 1 percent of their stated temperature, giving you a fast, tool-free verification.
Pro Tip: According to Lincoln Electric's preheat guidance, Lincoln Electric's preheat guidance required on low carbon steels less than 1 in. thick. However, as the chemistry, diffusible hydrogen level of the weld metal, restraint, or section thickness increases, the demand for preheat also increases. When in doubt on alloy steels, consult AWS D1.1 Table 3.2 for the minimum preheat temperature specific to your material and thickness combination.
Benchmark: Often, a part must stay within a specific temperature range for a certain amount of time, such as between 250 degrees and 400 degrees Fahrenheit for 30 minutes, before welding can start. Welders typically must monitor the base metal's temperature between weld passes to ensure the material remains within the required range.
What Happens When You Skip Welding Prep

Let's be honest about the actual cost of skipping prep. Material prep decides whether a joint fuses properly. Skipping cleaning, leaving gaps inconsistent, or misaligning components creates small flaws that grow under stress.
Most weld failures that aren't caused by bad technique stem from bad prep. Common mistakes include: skipping degreasing and assuming grinding is enough; using the same brush across different metals, causing cross-contamination; not removing mill scale on hot-rolled steel, leading to undercut or lack of fusion.
From a contractor standpoint, the financial argument is straightforward. If weld defects are found, the necessary repairs add time and money to a process that typically already has a tight project timeline and may be occurring in a challenging environment. A five-minute prep step that prevents a two-hour rework is always the right investment.
Frequently Asked Questions
What is the most important welding prep step for beginners?
Chemical degreasing is the most critical and the most overlooked step for anyone new to welding. Even after grinding or wire brushing, tiny particles like grease, oils, dirt, fingerprints, and cutting fluids may remain on the surface of the metal. While welding, these remains can evaporate and introduce pollutants into the weld pool, which results in weakening the weld and porosity. Start with a clean wipe-down using acetone or a non-chlorinated solvent before reaching for any abrasive tool.
How do I know what grit abrasive to use for welding prep?
The rule from Weiler Abrasives is to start with the least aggressive option and only increase if needed. If the application requires an abrasive product for surface cleaning, consider what you're trying to remove. For weld preparation, start with a less coarse option and increase in aggression only as necessary. With heavier coatings and mill scale, the best option is usually a grinding wheel or a flap disc. For most prep situations on carbon steel, a 60-grit flap disc is the right starting point.
Does MIG welding require more prep than stick welding?
Yes. Gas Metal Arc Welding or MIG welding and Gas Tungsten Arc Welding or TIG welding require clean surfaces. TIG welding is the cleanest method but requires squeaky clean surfaces to work. MIG welding is somewhere in between, but when in doubt, it is always better to clean the surface to avoid porosity, cracks, inclusion, and spatter. Stick (SMAW) is more forgiving of light contamination, but relying on that tolerance is a quality compromise that shows up in inspection.
When do I need to bevel a joint, and what angle should I use?
Chamfering is a key step in preparing metal for welding. This process involves cutting the edges of metal at angles to enhance weld strength and filler penetration, especially useful for high-load welds. As a practical threshold, bevel any plate 3/16 inch or thicker. For standard structural work, the AWS D1.1 prequalified V-groove calls for a 60-degree included angle (30 degrees per side) with a root opening of 1/16 to 1/8 inch depending on the joint type.
How do I know if my weld prep is good enough before I start welding?
Use a clean rag and, if needed acetone to ensure no contaminants remain on the metal. Before welding, inspect the weld area for cracks or gaps that may have been missed or created during grinding. Repair any cracks or gaps before welding. The surface should be visually clean, free of visible mill scale or rust, dry, and show bare metal sheen. If you can smell solvent, wait for it to fully evaporate before striking an arc.
The Bottom Line
The four best welding prep methods, chemical degreasing, mechanical cleaning and abrasive selection, joint fit-up and beveling, and preheating, form a complete system. No matter your skill level or the welding process you're using, proper joint preparation is non-negotiable for achieving strong, clean, and reliable welds. From removing contaminants and managing oxide layers to preheating thick materials and using the right tools, every step in the prep phase plays a crucial role in weld integrity.
For contractors and fabricators who run these steps daily, investing in the right welding prep tools from Pro-Graad puts professional-grade abrasive systems into your hands at a direct-to-user price point. When the weld holds because the prep was done right, that is the only outcome that matters.
Sources
-
Weld-Joint Preparation Guide: Dos and Don'ts, ESAB. Covers chemical cleaning, contaminant removal, and proper work clamp placement. To start, remove oil, grease
-
How to Prep Metal for Welding: Step-by-Step Guide, Weld Support Parts. Covers degreasing sequence, bevel standards, and abrasive selection. https://blog.weldsupportparts.com/2025/11/17/how-to-prep-metal-for-welding-step-by-step-guide/
-
5 Steps for Proper Weld Preparation, The Fabricator / Weiler Abrasives. Covers material planning, cutting, beveling, surface prep, and cleaning. The Fabricator's 5-step weld preparation guide
-
Strategies for Proper Weld Preparations, Weiler Abrasives. Covers abrasive selection, grit choice, and flap disc type selection. https://www.weilerabrasives.com/en/na-articles/strategies-for-proper-weld-preparation
-
Preheat in Welding: What Is It and When Should You Use It?, MillerWelds. Covers preheat methods, temperature ranges, and applications by material. https://www.millerwelds.com/resources/article-library/preheat-in-welding-what-is-it-and-when-should-you-use-it
-
What is Preheat, Lincoln Electric. Technical guide to preheat requirements, AWS D1.1 reference, and hydrogen control. Lincoln Electric's preheat guidance
-
Mastering Weld Preheat: Essential Techniques for Stronger Joints, Powerblanket. Covers preheat temperature targets by material type and thickness. Powerblanket's weld preheat guide
-
Weld Joint Prep Guide (AWS D1.1), ToolGrit. Covers prequalified groove joint dimensions, bevel angles, and cutting methods. AWS D1.1 prequalified joint details from the Weld Joint Prep Guide
-
AWS D1.1 Structural Steel Beveling Requirements, BevelingTech/Kedes Machine. Covers shop vs. code-floor gaps and bevel consistency. https://bevelingtech.com/guide/aws-d1-1-beveling-requirements/
-
Tips for Properly Prepping Metal for Welding, YesWelder. Covers planning, fit-up, abrasive grits, and process-specific surface requirements. https://yeswelder.com/blogs/yeswelder/tips-for-properly-prepping-metal-for-welding
-
Welding Defects Guide: Types, Causes, and Prevention, Xiris. Covers incomplete fusion, porosity, and structural impact. https://blog.xiris.com/welding-defects-guide
-
How to Prepare Surfaces for Welding: Best Practices and Tools, Siegmund Welding Tables USA. Covers tool selection and contamination types. https://weldingtablesandfixtures.com/blogs/the-welders-blog/how-to-prepare-surfaces-for-welding-best-practices-and-tools
-
Pre- and Post-Weld Cleaning Protocols, Mechaniquad. Covers cross-contamination, oxide removal, and interpass cleaning. https://www.mechaniquad.com/2025/06/pre-and-post-weld-cleaning-protocols.html
-
Pro-Graad, Professional-grade abrasives and finishing tools for contractors and tradespeople. https://pro-graad.com/